Posts tagged: dev

All posts with the tag "dev"

316 posts latest post 2026-09-19
Publishing rhythm
Aug 2026 | 4 posts

In my adventure to learn django, I want to be able to setup REST api’s to feed into dynamic front end sites. Potentially sites running react under the hood.

cell shaded full body shot of a cybernetic blue soldier with glowing eyes working ina lab, llustration, post grunge, pink glowing volumetric lighting, engulfed in smoke and fog, concept art by josan gonzales and wlop, by james jean, Victo ngai, David Rubín, Mike Mignola, Laurie Greasley, highly detailed, sharp focus,alien,Trending on Artstation, HQ, deviantart, art by artgem" -s50 -W832 -H416 -C18.0 -Ak_lms -S4270306418

Install #

To get started lets open up a todo app that I created with django-admin startproject todo.

pip install djangorestframework

Install APP #

Now we need to declare rest_framwork as an INSTALLED_APP.

INSTALLED_APPS = [
    ...
    "rest_framework",
    ...
]

create the api app #

Next I will create all the files that I need to get the api running.

mkdir api
touch api/__init__.py api/serializers.py api/urls.py api/views.py

cell shaded full body shot of a cybernetic blue soldier with glowing eyes working ina lab, llustration, post grunge, pink glowing volumetric lighting, concept art by josan gonzales and wlop, by james jean, Victo ngai, David Rubín, Mike Mignola, Laurie Greasley, highly detailed, sharp focus,alien,Trending on Artstation, HQ, deviantart, art by artgem" -s50 -W832 -H416 -C7.5 -Ak_lms -S3862698977

base/models.py #

I already have the following model from last time I was playing with django. It will suffice as it is not the focus of what I am learning for now.

Note the name of the model class is singular, this is becuase django will automatically pluralize it in places like the admin panel, and you would end up with Itemss.

from django.db import models

# Create your models here.

class Item(models.Model):
    name = models.CharField(max_length=200)
    created = models.DateTimeField(auto_now_add=True)

    def __str__(self):
        return f"{self.priority} {self.name}"

Next I will make some dummy data to be able to return. I popped open ipython and made a few records.

from base.models import Item

Item.objects.create(name='first')
Item.objects.create(name='second')
Item.objects.create(name='third')

api/serializers.py #

Next we need to set up a serializer to seriaze and de-serialize data between our model and json. You can specify each field individually or all of them by passing in __all__.

from rest_framework import serializers

from base.models import Item


class ItemSerializer(serializers.ModelSerializer):
    class Meta:
        model = Item
        fields = '__all__'

api/views.py #

“cell shaded full body shot of a shiny golden cybernetic soldier with glowing eyes looking through binoculars, llustration, post grunge, pink glowing volumetric lighting, engulfed in smoke and fog, concept art by josan gonzales and wlop, by james jean, Victo ngai, David Rubín, Mike Mignola, Laurie Greasley, highly detailed, sharp focus,alien,Trending on Artstation, HQ, deviantart, art by artgem” -s50 -W832 -H416 -C18.0 -Ak_lms -S2111691103 cell shaded full body shot of a shiny golden cybernetic soldier with glowing eyes looking through binoculars, llustration, post grunge, pink glowing volumetric lighting, engulfed in smoke and fog, concept art by josan gonzales and wlop, by james jean, Victo ngai, David Rubín, Mike Mignola, Laurie Greasley, highly detailed, sharp focus,alien,Trending on Artstation, HQ, deviantart, art by artgem command

Now we need a view leveraging the djangorestframework. The serializer we just created will be used to serialize all of the rows into a list of objects that Response can handle.

Note: to return a collection of model objects we need to set many to True

from rest_framework.decorators import api_view
from rest_framework.response import Response

from base.models import Item

from .serializers import ItemSerializer


@api_view(["GET"])
def get_data(request):
    items = Item.objects.all()
    serializer = ItemSerializer(items, many=True)
    return Response(serializer.data)

@api_view(['POST'])
def add_item(request):
    serializer = ItemSerializer(data = request.data)
    if serializer.is_valid():
        serializer.save()
    return Response()

api/urls.py #

“cell shaded full body shot of a shiny golden cybernetic soldier with glowing eyes looking at a map, llustration, post grunge, pink glowing volumetric lighting, engulfed in smoke and fog, concept art by josan gonzales and wlop, by james jean, Victo ngai, David Rubín, Mike Mignola, Laurie Greasley, highly detailed, sharp focus,alien,Trending on Artstation, HQ, deviantart, art by artgem” -s50 -W832 -H416 -C18.0 -Ak_lms -S192089936

Now we need to setup routing to access the views through an url.

from django.urls import path

from . import views

urlpatterns = [
        path('', views.get_data),
        path('add/', views.add_item),
        ]

todo/urls.py #

Then we need to include these urls from our api in the urls specified by settings.ROOT_URLCONf

from django.urls import path

urlpatterns = [
    ...
    path("api/", include("api.urls")),
]

Run it #

python manage.py runserver

Running the developement server and going to localhost:8000/api we can see the full list of items in th api.
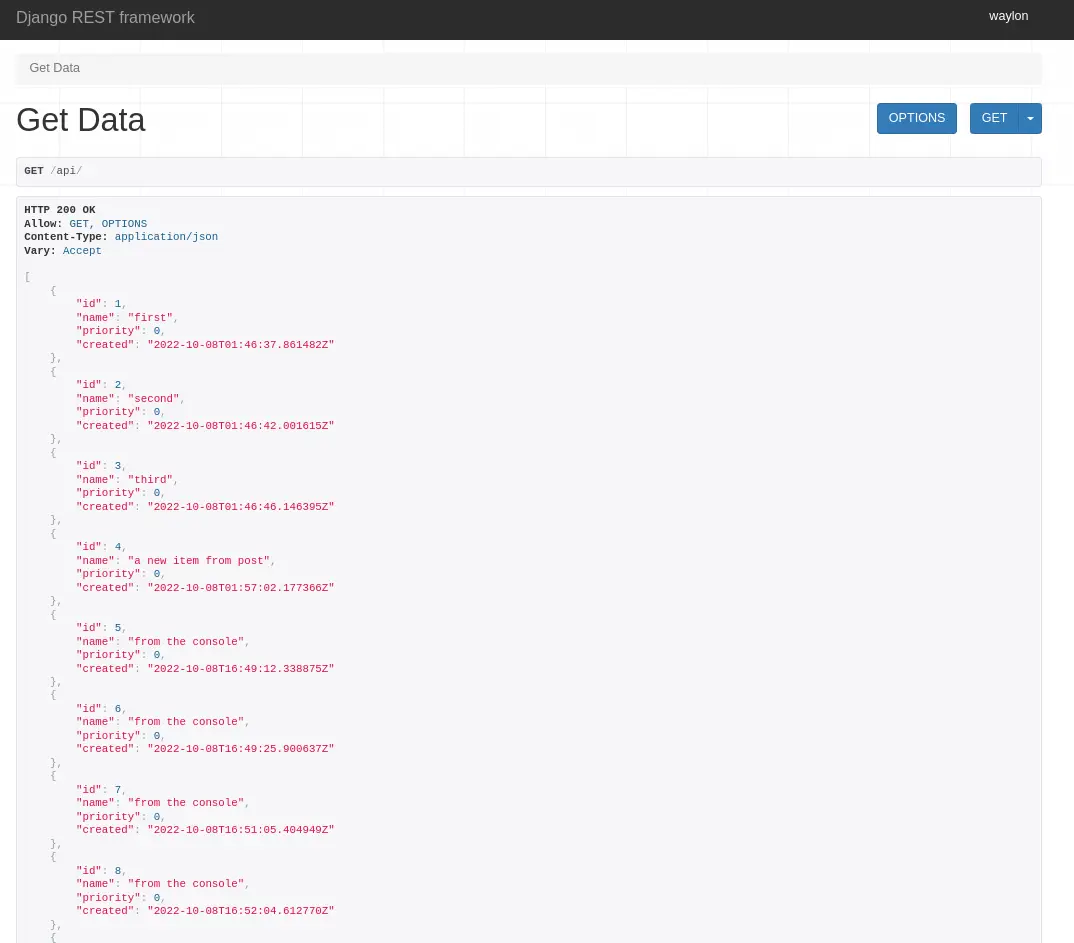
djangorestframework-get-items.webp

My next step into django made me realize that I do not have access to the admin panel, turns out that I need to create a cuper user first.

“cybernetic soldier working on a rusting tape machine robot, cinematic lighting, detailed, cell shaded, 4 k, warm colours, concept art, by wlop, ilya kuvshinov, artgerm, krenz cushart, greg rutkowski, pixiv. cinematic dramatic atmosphere, sharp focus, volumetric lighting, cinematic lighting, studio quality” -s50 -W832 -H416 -C12.0 -Ak_lms -S3309980874

Run Migrations #

Right away when trying to setup the superuser I ran into this issue

django.db.utils.OperationalError: no such table: auth_user

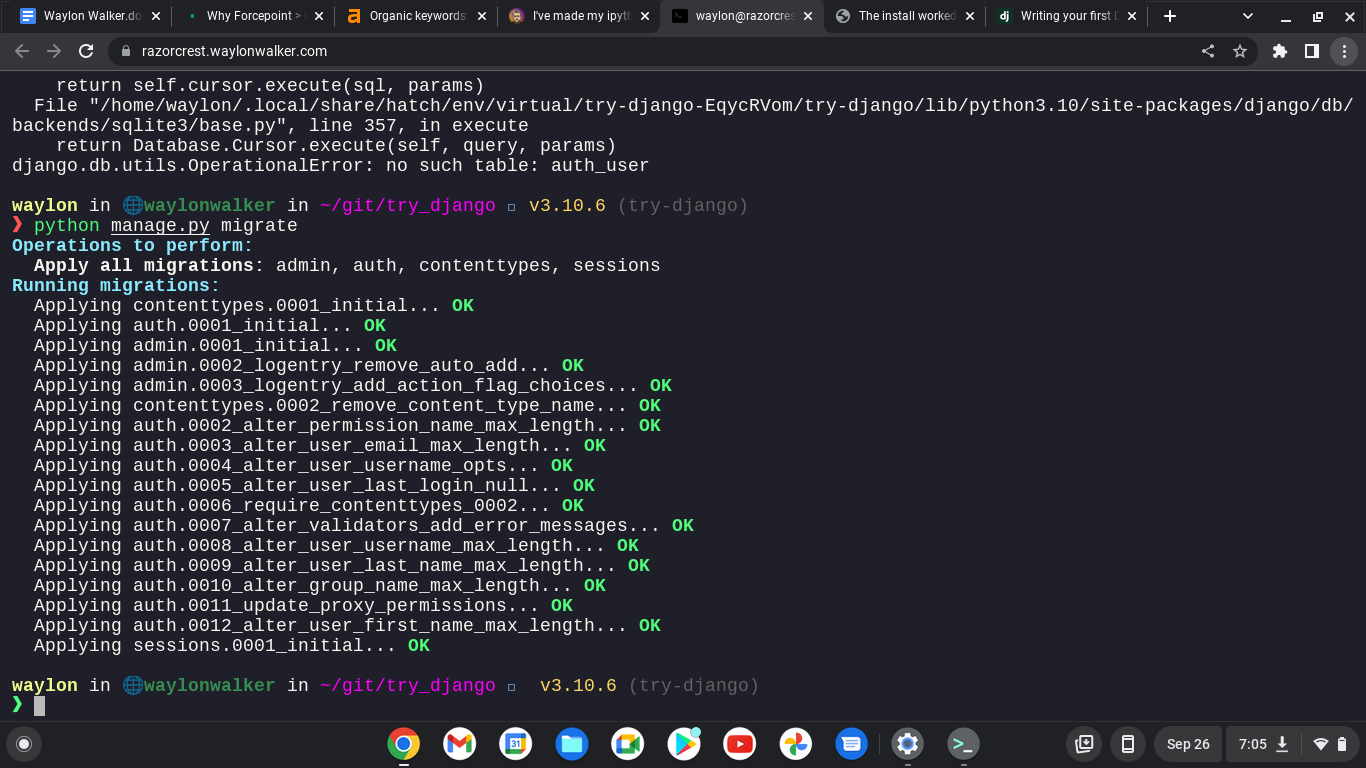
Back to the tutorial tells me that I need to run migrations to setup some tables for the INSTALLED_APPS, django.contrib.admin being one of them.

python manage.py migrate
trydjango-migration.png

yes I am still running remote on from my chromebook.

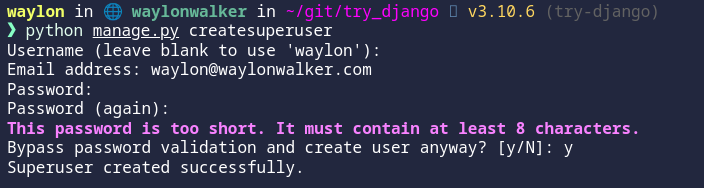
python manage.py createsuperuser
trydjango-create-superuser.png

The super user has been created.

“cybernetic soldier working on a rusting tape machine robot, cinematic lighting, detailed, cell shaded, 4 k, warm colours, concept art, by wlop, ilya kuvshinov, artgerm, krenz cushart, greg rutkowski, pixiv. cinematic dramatic atmosphere, sharp focus, volumetric lighting, cinematic lighting, studio quality” -s50 -W832 -H416 -C12.0 -Ak_lms -S2018296614

CSRF FAILURE #

My next issue trying to run off of a separate domain was a cross site request forgery error.

Since this is a valid domain that we are hosting the app from we need to tell Django that this is safe. We can do this again in the settings.py, but this time the variable we need is not there out of the box and we need to add it.

CSRF_TRUSTED_ORIGINS = ['https://localhost.waylonwalker.com']

I made it!! #

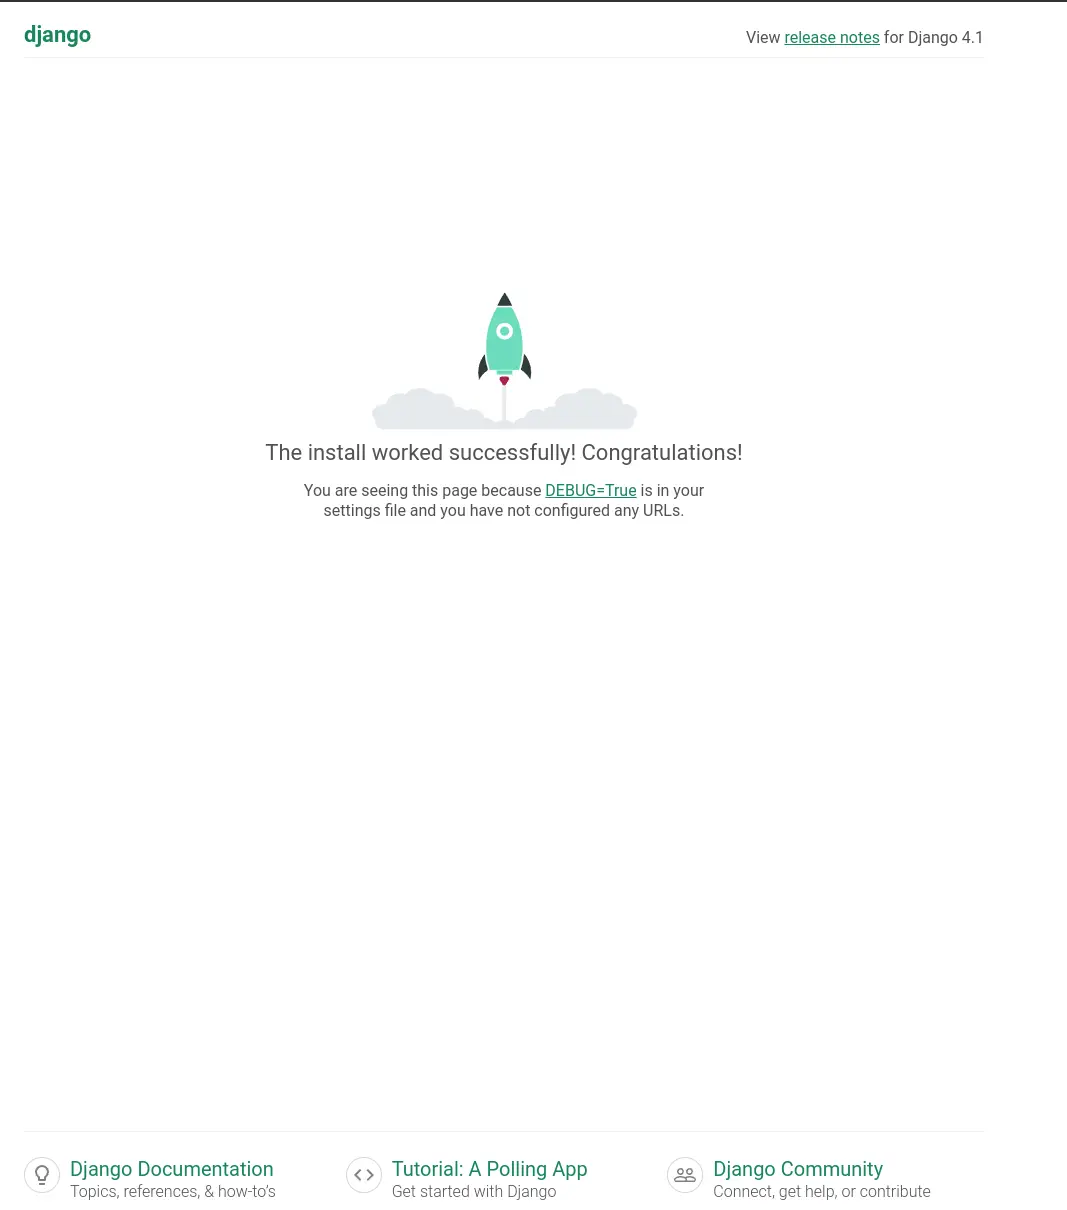
And we are in, and welcomed for the first time with this django admin panel.

trydjango-hello.webp

Remote Hosting #

You might find these settings helpful as well if you are trying to run your site on a remote host like aws, digital ocean, linode, or any sort of cloud providor. I had it running in my home lab while I was out of the house and ssh’d in over with a chromebook.

“cybernetic soldier working on a rusting tape machine robot, cinematic lighting, detailed, cell shaded, 4 k, warm colours, concept art, by wlop, ilya kuvshinov, artgerm, krenz cushart, greg rutkowski, pixiv. cinematic dramatic atmosphere, sharp focus, volumetric lighting, cinematic lighting, studio quality” -s50 -W832 -H416 -C12.0 -Ak_lms -S1092166059

I am continuing my journey into django, but today I am not at my workstation. I am ssh’d in remotely from a chromebook. I am fully outside of my network, so I can’t access it by localhost, or it’s ip. I do have cloudflared tunnel installed and dns setup to a localhost.waylonwalker.com.

Settings #

I found this in settings.py and yolo, it worked first try. I am in from my remote location, and even have auth taken care of thanks to cloudflare. I am really hoping to learn how to setup my own auth with django as this is one of the things that I could really use in my toolbelt.

ALLOWED_HOSTS = ['localhost.waylonwalker.com']
“cell shaded long shot of a cybernetic blue bald soldier with glowing blue eyes as Borderlands 3 concept art, llustration, post grunge, concept art by josan gonzales and wlop, by james jean, Victo ngai, David Rubín, Mike Mignola, Laurie Greasley, highly detailed, sharp focus,alien,Trending on Artstation, HQ, deviantart, art by artgem” -s50 -W832 -H416 -C7.5 -Ak_lms -S3422093952

I have no experience in django, and in my exploration to become a better python developer I am dipping my toe into one of the most polished and widely used web frameworks Django to so that I can better understand it and become a better python developer.

If you found this at all helpful make sure you check out the django tutorial

“An atronaut working in a lab, there is a long snake working along side, shallow depth of field beakers, test tubes, volumetric lighting, pink lighting, by victo ngai, killian eng vibrant colours, dynamic lighting, digital art” -s50 -W768 -H448 -C7.5 -Ak_lms -S2250540408

install django #

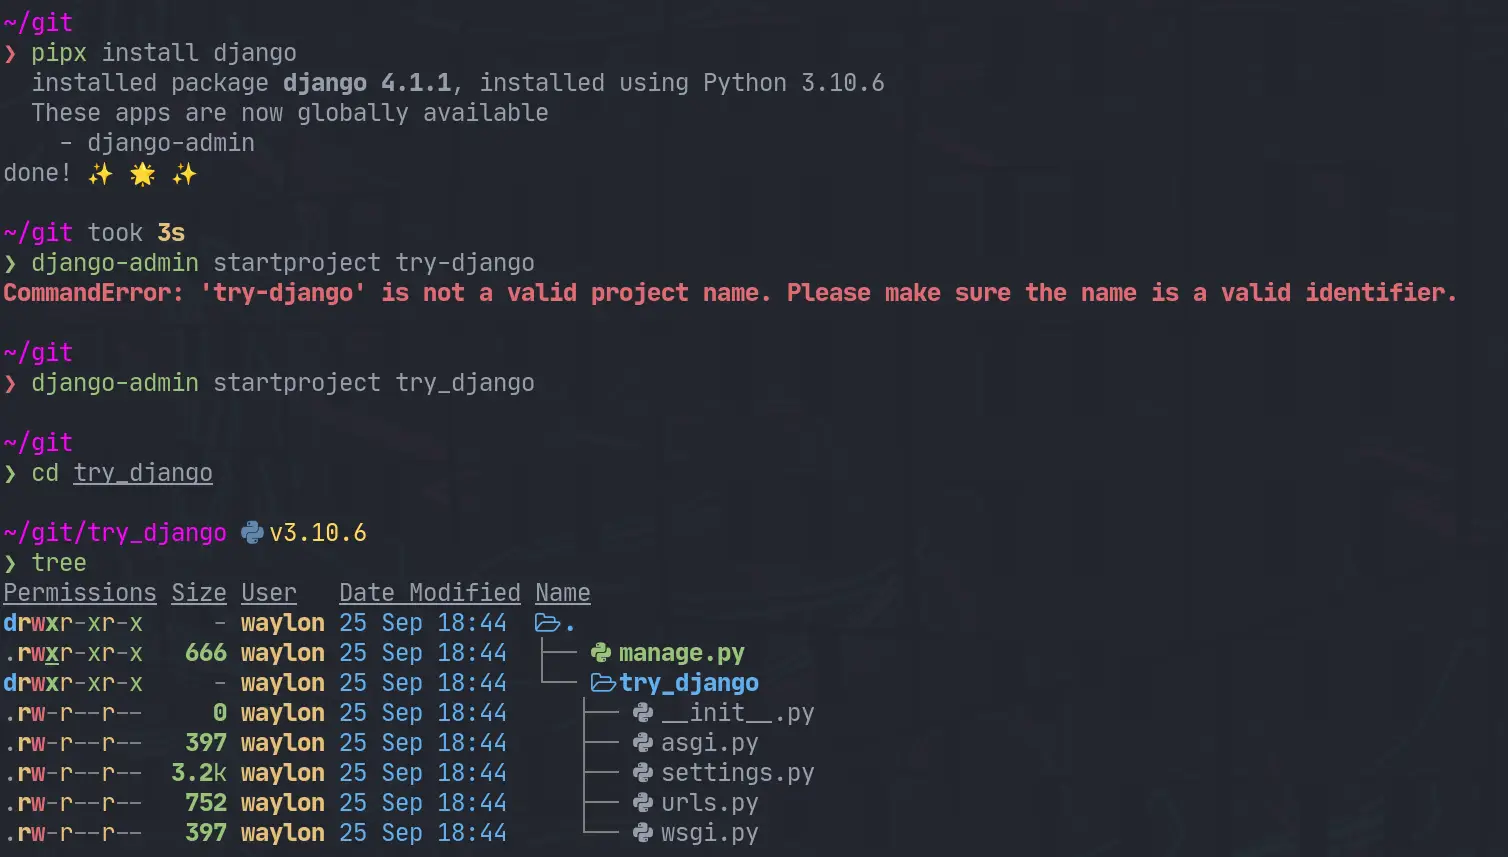
The first thing I need to do is render out a template to start the project. For this I need the django-admin cli. To get this I am going the route of pipx it will be installed globally on my system in it’s own virtual environment that I don’t have to manage. This will be useful only for using startproject as far as I know.

pipx install django
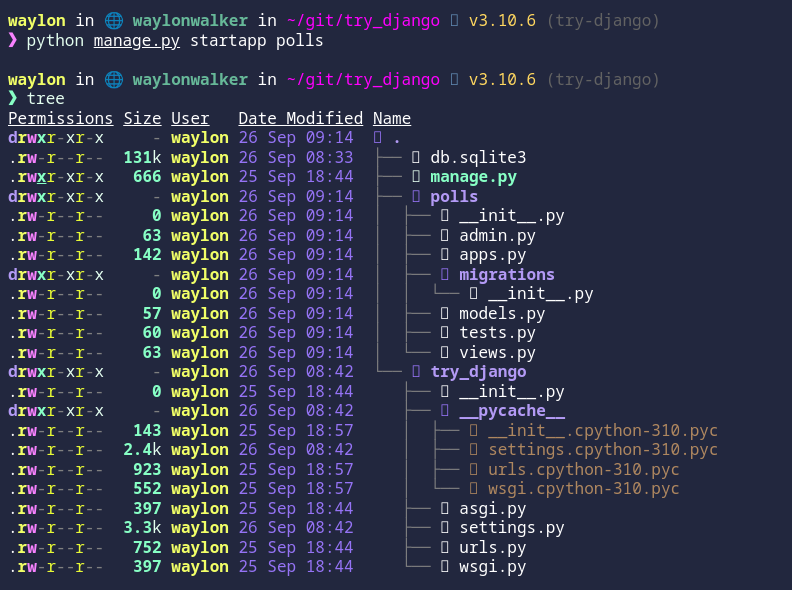
django-admin startproject try_django
cd try_django
django-startproject.webp

Make a venv #

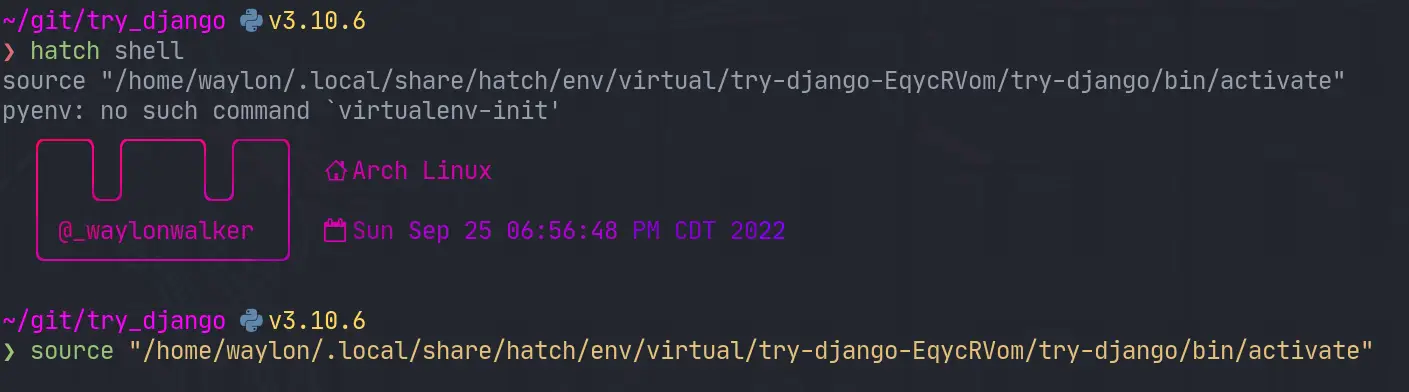
Once I have the project I need a venv for all of django and all of my dependencies I might need for the project. I have really been diggin hatch lately, and it has a one line “make a virtual environment and manage it for me” command.

hatch shell
trydjango-venv.webp

If hatch is a bit bleeding edge for you, or it has died out by the time you read this. The ol trusty venv will likely stand the test of time, this is what I would use for that.

python -m .venv --prmpt `basename $PWD`
. ./.venv/bin/activate

Start the webserver #

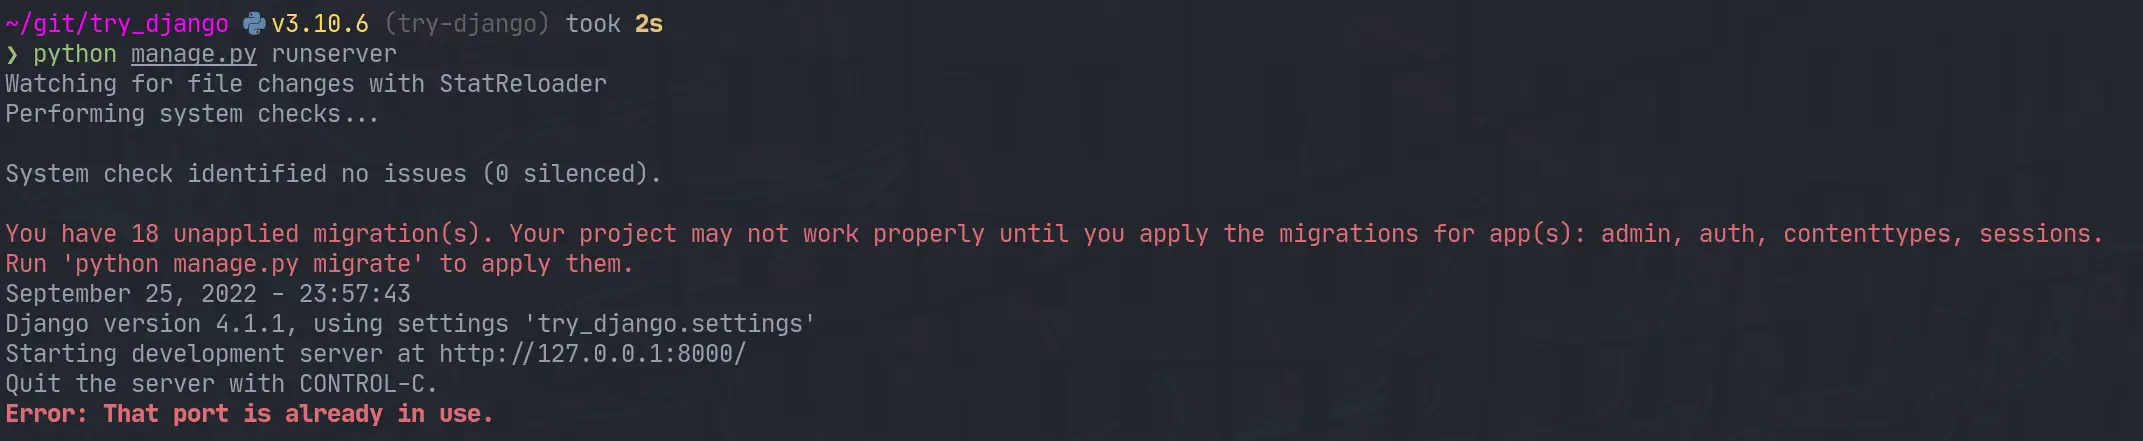
Next up we need to start the webserver to start seeing that development content. The first thing I did was run it as stated in the tutorial and find it clashed with a currently running web server port.

python manage.py runserver
django-runserver-oops.webp

I jumped over to that tmux session, killed the process and I was up and running.

trydjango-runserver.webp

What’s running #

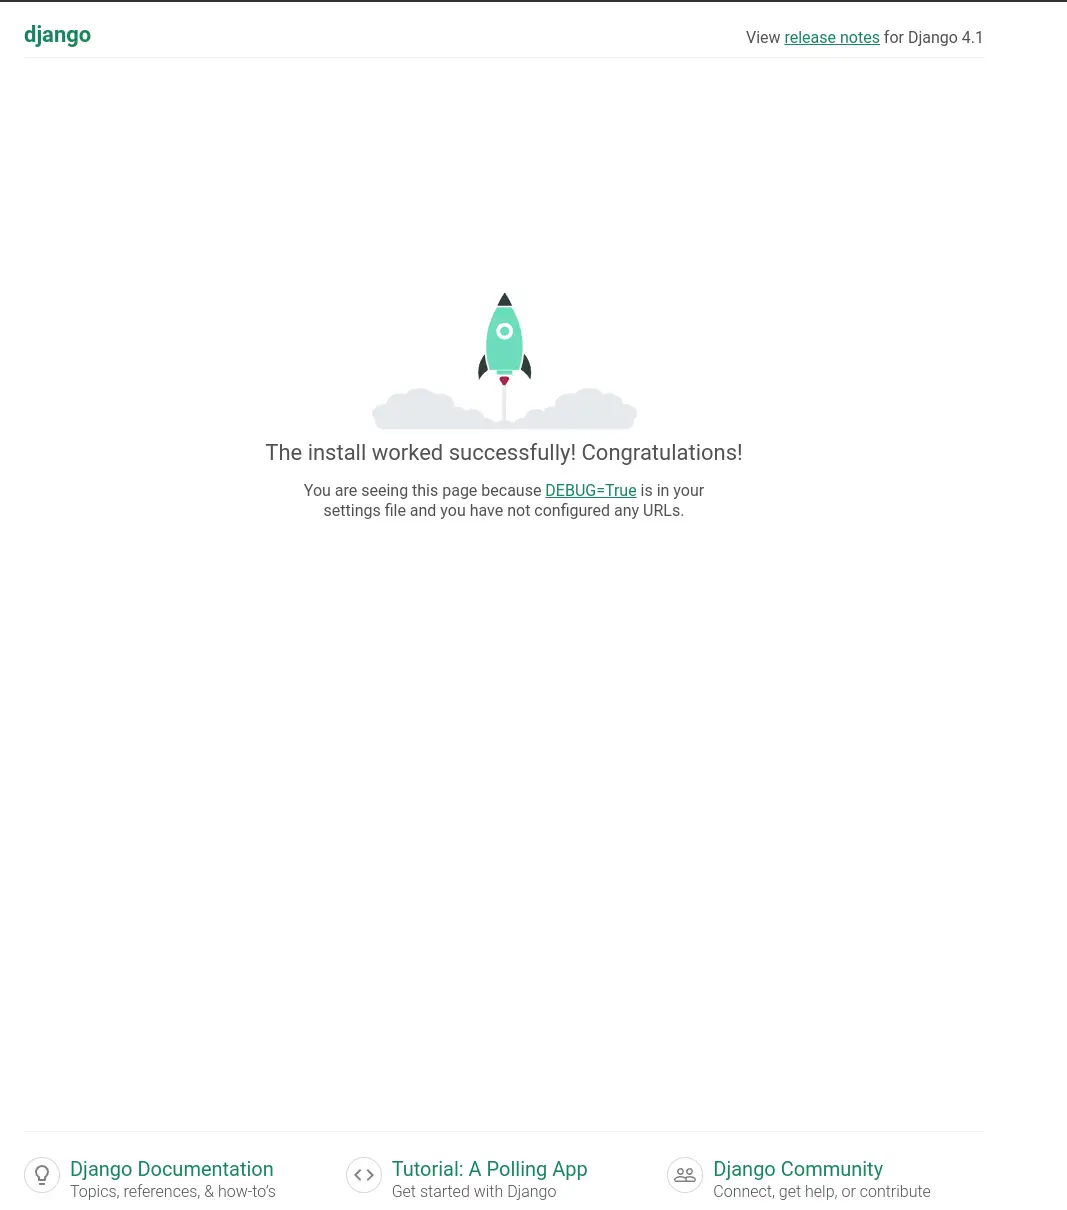
The default django hello world looks well designed. You are first presented with this page.

trydjango-hello.webp

Next #

I opened up the urls.py to discover that the only configured url was at /admin. I tried to log in as admin, but was unable to as I have not yet created a superuser. Next time I play with django that is what I will explore.

An astronaut working in a dimly lit labratory, it is almost black, heavy dark blacks, black space, heavy vingette, hacking on a computer terminal, htop is running, shallow depth of field beakers, test tubes, by Alphonse Mucha, dynamic lighting, digital art

I recently attended python web conf 2022 and after seeing some incredible presentations on it I am excited to give htmx a try.

The base page #

Start with some html boilerplate, pop in a script tag to add the htmx.org script, and a button that says click me. I added just a tish of style so that it does not sear your delicate developer your eyes.

<!DOCTYPE html>
<html lang="en">
  <head>
    <title></title>
    <meta charset="UTF-8">
    <meta name="viewport" content="width=device-width, initial-scale=1">
    <style>
      html  { background: #1f2022; color: #eefbfe; font-size: 64px; }
      button {font-size: 64px;}
      body { height: 100vh; width: 100vw; display: flex; justify-content: center; align-items:center; }
    </style>
    <!-- Load from unpkg -->
    <script src="https://unpkg.com/[email protected]"></script>
  </head>
  <body>
  <!-- have a button POST a click via AJAX -->
  <button hx-get="/partial" hx-swap="outerHTML">
    Click Me
  </button>

  </body>
</html>

Save this as index.html and fire up a webserver and you will be presented with this big beefcake of a button.

big beefcake of a button

If you don’t have a development server preference I reccomend opening the terminal and running python -m http.server 8000 then opening your browser to localhost:8000

The Partial #

Now the page has a button that is ready to replace itself, notice the hx-swap="outerHTML">, with the contents of /partial. To create a static api of sorts we can simply host a partial page in a file at /partial/index.html with the following contents.

<p>
hello
</p>
the final results

Tree #

To make it a bit clearer here is what the file tree looks like after setting this up.

~/git/htmx  v3.9.7 (git)
❯ tree
.
├── clicked
│   └── index.html
└── index.html

Demo #

I added htmx to this page and setup a partial below, check out this easter egg.

Let’s make a vim command to automatically collect all the links in these posts at the end of each article. Regex confuses the heck out of me… I don’t have my regex liscense, but regex can be so darn powerful especially in an editor.

Step one #

Before you run someone’s regex from the internet that you don’t fully understand, check your git status and make sure you are all clear with git before you wreck something

Inspiration #

Something that I have always appreciated form Nick Janetakis is his links section. I often try to gather up the links at the end of my posts, but often end up not doing it or forgetting.

Searchng through the internet I was able to find an article from Vitaly Parnas called vim ref links that did almost exactly what I needed, except it was more complicated and made them into ref liks.

Here is my interpretation of the code I took from Vitaly’s post. It makes a Links section like the one at the bottom of this post.

function! MdLinks()
    $norm o## Links
    $norm o
    g/\[[^\]]\+\]([^)]\+)/t$
    silent! '^,$s/\v[^\[]*(\[[^\]]+\])\(([^)]+)\)[^\[]*/* \1(\2)/g
    nohl
endfunction
command! MdLinks call MdLinks()

So far it is working for me and saving me a few seconds off each post I make.

Mermaid gives us a way to style nodes through the use of css, but rather than using normal css selectors we need to use style <nodeid>. This also applies to subgraphs, and we can use the name of the subgraph in place of the nodeid.

graph TD;
    a --> A
    A --> B
    B --> C

    style A fill:#f9f,stroke:#333,stroke-width:4px
    style B fill:#f9f,stroke:#333,stroke-width:4px

    subgraph one
        a
    end

    style one fill:#BADA55

produces the following graph

graph TD; a --> A A --> B B --> C style A fill:#f9f,stroke:#333,stroke-width:4px style B fill:#f9f,stroke:#333,stroke-width:4px subgraph one a end

style one fill:#BADA55

Mermaid provides some really great ways to group or fence in parts of your graphs through the use of subgraphs.

Here we can model some sort of data ingest with some raw iot device and our warehouse in different groups.

graph TD;

    subgraph raw_iot
        a
    end

    subgraph warehouse
        A --> B
        B --> C
    end
graph TD;
subgraph raw_iot
    a
end

subgraph warehouse
    A --> B
    B --> C
end

connecting subgroups #

If we want to connect them, we can make a connection between a and A outside of the subgraphs.

graph TD;

    subgraph raw_iot
        a
    end

    a --> A

    subgraph warehouse
        A --> B
        B --> C
    end
graph TD;
subgraph raw_iot
    a
end

a --> A

subgraph warehouse
    A --> B
    B --> C
end

separation of concerns #

It’s also possible to specify subgraphs separate from where you define your nodes. which allows for some different levels of grouping that would not be possible if you were to define all your nodes inside of a subgraph.

graph TD;
    a --> A
    A --> B
    B --> C

    subgraph one
        A
        C
    end
graph TD; a --> A A --> B B --> C
subgraph warehouse
    A
    C
end

Since GitHub started supporting mermaid in their markdown I wanted to take another look at how to implement it on my site, I think it has some very nice opportunities in teaching, documenting, and explaining things.

The docs kinda just jumped right into their mermaid language and really went through that in a lot of depth, and skipped over how to implement it yourself, turns out its pretty simple. You just write mermaid syntax in a div with a class of mermaid on it!

<script src='https://unpkg.com/[email protected]/dist/mermaid.min.js'></script>
<div class='mermaid'>
graph TD;
a --> A
A --> B
B --> C
</div>

You just write mermaid syntax in a div with a class of mermaid on it!

The above gets me this diagram.

graph TD; a --> A A --> B B --> C

This feels so quick and easy to start getting some graphs up and running, but does lead to layout shift and extra bytes down the pipe. The best solution in my opionion would be to forgo the js and ship svg. That said, this is do dang convenient I will be using it for some things.

In looking for a way to automatically generate descriptions for pages I stumbled into a markdown ast in python. It allows me to go over the markdown page and get only paragraph text. This will ignore headings, blockquotes, and code fences.

import commonmark
import frontmatter

post = frontmatter.load("post.md")
parser = commonmark.Parser()
ast = parser.parse(post.content)

paragraphs = ''
for node in ast.walker():
    if node[0].t == "paragraph":
        paragraphs += " "
        paragraphs += node[0].first_child.literal

It’s also super fast, previously I was rendering to html and using beautifulsoup to get only the paragraphs. Using the commonmark ast was about 5x faster on my site.

Duplicate Paragraphs #

When I originally wrote this post, I did not realize at the time that commonmark duplicates nodes. I still do not understand why, but I have had success duplicating them based on the source position of the node with the snippet below.

from itertools import compress

import commonmark
import frontmatter

post = frontmatter.load("post.md")
parser = commonmark.Parser()
ast = parser.parse(post.content)

# find all paragraph nodes
paragraph_nodes = [
    n[0]
    for n in ast.walker()
    if n[0].t == "paragraph" and n[0].first_child.literal is not None
]
# for reasons unknown to me commonmark duplicates nodes, dedupe based on sourcepos
sourcepos = [p.sourcepos for p in paragraph_nodes]
# find first occurence of node based on source position
unique_mask = [sourcepos.index(s) == i for i, s in enumerate(sourcepos)]
# deduplicate paragraph_nodes based on unique source position
unique_paragraph_nodes = list(compress(paragraph_nodes, unique_mask))
paragraphs = " ".join([p.first_child.literal for p in unique_paragraph_nodes])

BeautifulSoup is a DOM like library for python. It’s quite useful to manipulate html. Here is an example to find_all html headings. I stole the regex from stack overflow, but who doesn’t.

Make an example #

sample.html

Lets make a sample.html file with the following contents. It mainly has some headings, <h1> and <h2> tags that I want to be able to find.

<!DOCTYPE html>
<html lang="en">
  <body>
    <h1>hello</h1>
    <p>this is a paragraph</p>
    <h2>second heading</h2>
    <p>this is also a paragraph</p>
    <h2>third heading</h2>
    <p>this is the last paragraph</p>

  </body>
</html>

Get the headings with BeautifulSoup #

Lets import our packages, read in our sample.html using pathlib and find all headings using BeautifulSoup.

from bs4 import BeautifulSoup
from pathlib import Path

soup = BeautifulSoup(Path('sample.html').read_text(), features="lxml")
headings = soup.find_all(re.compile("^h[1-6]$"))

And what we get is a list of bs4.element.Tag’s.

>> print(headings)
[<h1>hello</h1>, <h2>second heading</h2>, <h2>third heading</h2>]

I recently added a heading_link plugin to markata, you might notice the 🔗’s next to each heading on this page, that is powered by this exact technique.

Today I discovered a sweet new cli for compressing images. squoosh cli is a wasm powered cli that supports a bunch of formats that I would want to convert my website images to.

from the future

Unfortunately, due to a few people leaving the team, and staffing issues resulting from the current economic climate (ugh), I’m deprecating the CLI and libsquoosh parts of Squoosh. The web app will continue to be supported and improved. I know that sucks, but there simply isn’t the time & people to work on this. If anyone from the community wants to fork it, you have my blessing.

https://github.com/GoogleChromeLabs/squoosh/pull/1321

Web App #

First the main feature of squoosh is a web app that makes your images smaller right in the browser, using the same wasm. It’s sweet! There is a really cool swiper to compare the output image with the original, and graphical dials to change your settings.

CLI #

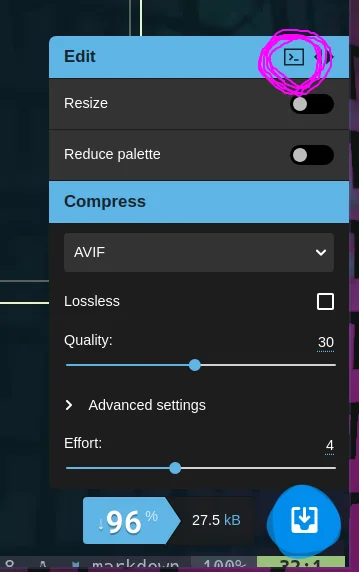
What is even cooler is that once you have settings you are happy with and are really cutting down those kb’s on your images, there is a copy cli command button! If you have npx (which you should if you have nodejs and npm) already installed it just works without installing anything more.

The button on squoosh.app

Converting all of my png’s to webp #

I copied the command that it gave me for converting to webp, and set it up to run on all of my pngs.

npx @squoosh/cli --webp \
  '{"quality":75 \
    "target_size":0 \
    "target_PSNR":0 \
    "method":4 \
    "sns_strength":50 \
    "filter_strength":60 \
    "filter_sharpness":0 \
    "filter_type":1 \
    "partitions":0 \
    "segments":4 \
    "pass":1 \
    "show_compressed":0 \
    "preprocessing":0 \
    "autofilter":0 \
    "partition_limit":0 \
    "alpha_compression":1 \
    "alpha_filtering":1 \
    "alpha_quality":100 \
    "lossless":0 \
    "exact":0 \
    "image_hint":0 \
    "emulate_jpeg_size":0 \
    "thread_level":0 \
    "low_memory":0 \
    "near_lossless":100 \
    "use_delta_palette":0 \
    "use_sharp_yuv":0 \
    }' \
    static/*.png -d squoosh-webp

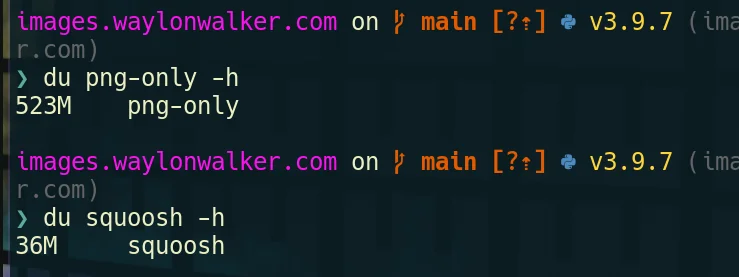
I opened my images repo and converted all pngs to webp using the command above. I got 94% compression on my existing pngs without resizing anything. This is dang impressive, and not too hard to do. I do want to refactor my images site at some point and include this as part of the ci system.

resulting file sizes for converting png to wepb.

I also converted to avif, but it sent all my cpus to 100 for quite awhile, for only another 2MB total. Not sure if its worth it or not.

Building Rich a Dev Server

Draft Post I’ve really been digging @willmcgugan ’s rich library for creating TUI like interfaces in python. I’ve only recently started to take full advantage of it. Dev Server # I am working on a project in which I want to have a dev server running continuously in the background. I really like dev servers theat automatically chooose an unused port and list out the running pid so that I can kill it if I need to. automatic port number auto-restart display ( port, pid, uptime) finding the port # I am very novice at best when it comes to sockets, the following function came from searching StackOverflow for how to tell if a port is in use. I recursively check if a port is being used, if it is I increment by one until I find an unused port to return. The Dev Server # I am going super basic here and just running. It works for what I need it for, it hosts my files for the browser to display, and if I try a route without an index. html it gives me a decent file list. Optionally if you wanted a…

Site Down During Build

Recently I noticed a new netlify site of mine was down while I was checking to see if new content was live. Later found out this was consistent after each and every push the site would go gown as soon as I hit push, and would not come back until the build finished. Is this normal? # Do other Netlify sites go down during build??? Short Answer NO. All of my google fu lead me to believe I was alone and none of my other sites do this. Digging into my build # My deploy script ends with the following. After resetting keys and watching it build half a dozen times I determined that everything was working as normal here. Opening the Nelify Console # After poking at the netlify console for hours I realized that the issue was that netlify was still auto-deploying from a no longer existing directory and would cause 404’s for every page. During build, then my build from GitHub Actions would deploy with the netlify cli. Netlify really likes to put a lot of warnings up when you are not deploying from…

Adding Audio to my blog posts

This is episode 1 of the Waylon Walker Audio experience, posts from waylonwalker.com {.hoverlink} in audio form. So I have had this idea for awhile to add audio to my blog posts. The idea partly comes from the aws blog, if you have ever been on their blog you will have noticed that they have a voiced by amazon polly section. What to Expect # Honestly I don’t know this is all new to me and I dont have much to go off of. For now its a test that may or may not work out. I will say that the time that I have available for clean audio is a bit limited so expect these to come out in batches as I get time to go back and record. What Not to Expect # One thing that makes the aws blog really hard to listen to is the robotic voice, I definitely don’t want that. This will be voiced by a real human, Me. At the same time written text doesn’t translate directly to audio well so don’t necessarily expect the audio to be word for word. Code blocks # There are a lot of code blocks in my blog, which don’t…

gatsby-remark-embedder

Inspired by discourse’s link expansion I am rolling out expansions for one line links on the blog waylonwalker. I was able to find a gatsby plugin gatsby-remark-embedder that expands one line links for social cards for popular platforms like twitter and YouTube through a repose from Kyle Mathews to my tweet. https://twitter.com/kylemathews/status/1329817928666005504 Use Cases # This covers a couple of use cases I have with very little effort. Twitter YouTube install # This was super quick and simple to setup, the only thing that was extra was to install the plugin as well as the. enable # Thats it, now I can embed tweets and YouTube videos by just leaving the link on a single line.

Expand One Line Links

I wanted a super simple way to cross-link blog posts that require as little effort as possible, yet still looks good in vanilla markdown in GitHub. I have been using a snippet that puts HTML into the markdown. While this works, it’s more manual/difficult for me does not look the best, and does not read well as Goals for new card # The new card should be fully automated to expand with title, description, and cover image. Bonus if I am able to attach a comment behind it. fully automated card expansion Title description cover image Old Card # If you can call it a card 🤣. This card was just an image wrapped in an anchor tag and a paragraph tag. I found this was the most consistent way to get an image narrower and centered in both GitHub and dev.to. The key here is that I have to put the HTML into the markdown. It looks a bit dirty while editing and quite frankly it’s a pain to deal with. New Card # My first eight years as a working professional. First step # My first attempt was to make my…

Why use a cms

When first learning to code its very common to hard code everything right into the code. This happens with most folks in just about any language. Whether its HTML or markdown for front end content, or even hardcoding parameters in our backend languages like python, or node.js. 🤷‍♀️ What’s wrong with hard coding everything? # Hard coding everything right into your code makes it really hard for non-technical collaborators to join. It makes it nearly impossible to hand websites off to clients without needing to come back for routine updates. The cms generally come with a rich content editor that feels more like something most folks are used to. There are buttons for changing the font, font-size, adding images, bold, italics, etc. Sometimes I don’t feel technical # Even when you are developing for a technical audience there is a layer of polish that comes from giving them a nice interface to edit their content in. YouTube doesn’t have you manually inserting records into the database to add…

How I Built My GitHub Profile

I ran a discussion on dev that collected quite a list of examples in the comment section. So many great calls to action, animations, memes, and weird tricks. My current profile # social icons # Upload all of your icons to the repo in a directory such as or, then link them with a attribute like below. I used html for mine, not sure if you can set the in markdown. note I did add a bit of (non-breaking-whitespace) between my icons. Without adding css this seemed like the simplest way to do it. Center # Aligning things in the center of the readme is super simple. I used this trick to align my social icons in the middle. right # For my latest post I floated it to the right with a little bit of action. You may need to play with where you put this in the document, and the size of elements to get things to flow right. redirects # In order to keep my latest post always up to date on my readme I implemented a netlify redirect to always point to my latest post. As a digital gardener this helps me…