- 11ty https://www.rockyourcode.com/how-to-deploy-eleventy-to-github-pages-with-github-actions/
- hugo puts it in the base url https://gohugo.io/getting-started/configuration/#baseurl
- mkdocs uses a special cli build command https://squidfunk.github.io/mkdocs-material/publishing-your-site/#github-pages
Upon first running an aws cli command using localstack you might end up with the following error.
Unable to locate credentials. You can configure credentials by running "aws configure".
Easy way #
The easy easiest way is to leverage a package called awscli-local.
pipx install awscli-local
Leveraging the awscli #
If you want to use the cli pro
pipx install awscli

aws config --profile localstack
# put what you want for the keys, but enter a valid region like us-east-1

alias aws='aws --endpoint-url http://localhost:4566 --profile localstack'
npx create-react-app todoreact
import React,{useState,useEffect} from 'react';
import './App.css';

function App() {
  const [data,setData]=useState([]);
  const [newName,setNewName]=useState([]);
  const getData=()=>{
    fetch('/api'
    ,{
      headers : {
        'Content-Type': 'application/json',
        'Accept': 'application/json'
       }
    }
    )
      .then(function(response){
        return response.json();
      })
      .then(function(myJson) {
        setData(myJson)
      });
  }
  useEffect(()=>{
    getData()
  },[])

  const addItem= async () => {
    const rawResponse = await fetch('/api/add/', {
      method: 'POST',
      headers: {
        'Accept': 'application/json',
        'Content-Type': 'application/json'
      },

    body: JSON.stringify({"name": newName})
    });
    const content = await rawResponse;

    console.log(content);
    getData()
  }


  return (
    <div className="App">
     {
       data && data.length>0 && data.map((item)=><p>{item.id}{item.priority}{item.name}<button>raise priority</button></p>)
     }
    <input type='text' value={newName} onChange={(e) => (setNewName(e.target.value))} />
    <button onClick={addItem} >add item</button>
    </div>
  );
}

export default App;
Hatch allows you to specify direct references for dependencies in your
pyproject.toml file. This is useful when you want to depend on a package that
is not available on PyPI or when you want to use a specific version from a Git
repository. Often used for unreleased packages, or unreleased versions of
packages.
[project]
dependencies = ['markata', 'markata-todoui@git+https://github.com/waylonwalker/markata-todoui']

[tool.hatch.metadata]
allow-direct-references=true
Setting up snapper on Arch
https://www.youtube.com/watch?v=_97JOyC1o2o Note # These are mostly my notes to remind myself, I’d Highly reccomend watching this-video or reading this arch wiki page /.snapshots already exists error # When I started running I ran into the following error. remove existing snapshots # configure snapper # btrfs subvolumes # # You should now see in mountpoints. Setting the default to @ # so that you can boot into snapper snapshots snapper ls # leaving off for now https://youtu.be/_97JOyC1o2o?t=909 config #
Muck
Steam achievements and progress for Muck - 2.04% complete with 1/49 achievements unlocked.

sein
Steam achievements and progress for sein - 8.77% complete with 5/57 achievements unlocked.
Running My Blog on 3.11-dev
3.10.5: 109.441 3.11-dev: 108.856

xrandr is a great cli to manage your windows in a linux distro using x11, which is most of them. The issue is that I can never remember all the flags to the command, and if you are using it with something like a laptop using a dock the names of all the displays tend to change every time you redock. This makes it really hard to make scripts that work right every time.
Homepage #
Check out the deresmos/xrandr-manager for more details on it.
installation #
xrander-manager is a python cli application that is simply a nice interface into xrandr. So you must have xrandr already installed, which is generally just there on any x11 window manager, I’ve never had to install it.
As with any python cli that is indended to be used as a global/system level cli application I always install them with pipx. This automates the process of creating a virtual environment for xrandr-manager for me, and does not clutter up my system packages with its dependencies that may eventually clash with another that I want to use.
# prereqs (xrandr, pipx)
pipx install xrandr-manager
set main monitor #
First if your main display is not set to the correct monitor set your main display first.
xrandr-manager -m HDMI-0
xrandr-manager -m DP-0
prompt mode #
If you dont know the name of your monitors and and don’t want to dig through
xrandr, you can just run --prompt and tab complete to fill set your main
display.
xrandr-manager --prompt
direction #
This is what I most often use xrandr-manager for. Once you have the main display set you can tell it where to put the other monitor. I’ve only tried this with two monitors, I have no idea what happens with more monitors.
xrandr-manager -d right
xrandr-manager -d left
xrandr-manager -d above
xrandr-manager -d below
mirror #
One thing that I always need to jump through hoops to do is mirror. Occasionally I want to mirror so that more people can see the screen while we are split screen gaming. This has seemed like a pain in any other xrandr utility, but trivial in xrandr-manager.
xrandr-manager --mirror
It logs out the xrandr command #
One nice thing about xrandr-manager is that it echos out the xrandr command that it’s running. This is nice because you can toss this behind a hotkey or an init script.
Guis #
Ya there are guis that do this. I’ve had good luck with arandr. It’s more intuitive to drag windows around like what you would do in windows. Every once in awhile it messes up and my polybar overlaps my windows, or my windows end up only on half the screen.
There are also graphics card specific utilities, Ive used nvidia x server settings and it mostly works similar to arandr.
jq has some syntax that will sneak up on you with complexity. It looks so good,
and so understandable, but everytime I go to use it myself, I don’t get it.
ijq is an interactive alternative to jq that gives you and nice repl that you
can iterate on queries quickly.
paru -Syu ijq
Here are some other articles, I decided to link at the time of writing this article.
JUT | Read Notebooks in the Terminal
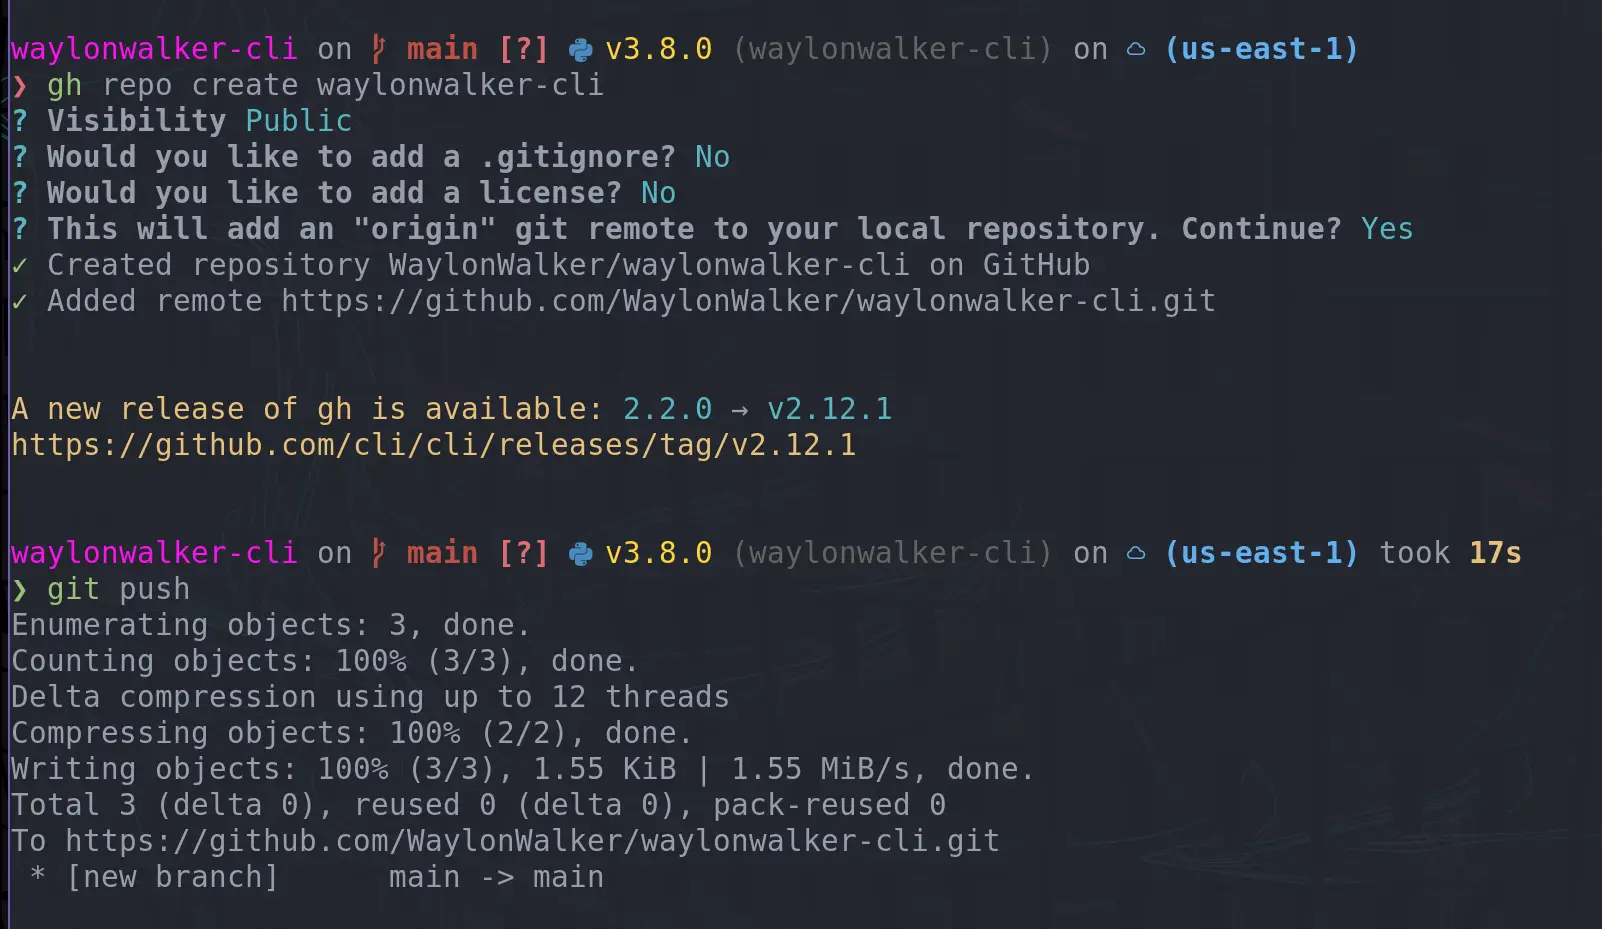
I love getting faster in my workflow, something I have recently added in is creating GitHub repos with the cli. I often create little examples of projects, but they just end up on my machine and not anywhere that someone else can see, mostly because it takes more effort to go create a repo. TIL you can create a repo right from the command line and push to it immediately.
gh repo create waylonwalker-cli
want to see what this repo I created is about? #
Check out what I created here.
pipx run waylonwalker
totally guessed at this post’s date
I’m still trying to understand this one, but this is how you force a python object to stop atexit.
import atexit

class Server:
    def __init__(
        self,
        auto_restart: bool = True,
        directory: Union[str, "Path"] = None,
        port: int = 8000,
    ):
        if directory is None:
            from markata import Markata

            m = Markata()
            directory = m.config["output_dir"]

        self.directory = directory
        self.port = find_port(port=port)
        self.start_server()
        atexit.register(self.kill)

    def start_server(self):
        import subprocess

        self.cmd = [
            "python",
            "-m",
            "http.server",
            str(self.port),
            "--directory",
            self.directory,
        ]

        self.proc = subprocess.Popen(
            self.cmd,
            stderr=subprocess.PIPE,
            stdout=subprocess.PIPE,
        )
        self.start_time = time.time()


    def kill(self):
        self.auto_restart = False
        self.proc.kill()

    def __rich__(self) -> Panel:
        if not self.proc.poll():
            return Panel(
                f"[green]serving on port: [gold1]{self.port} [green]using pid: [gold1]{self.proc.pid} [green]uptime: [gold1]{self.uptime} [green]link: [gold1] http://localhost:{self.port}[/]",
                border_style="blue",
                title="server",
            )

        else:
            if self.auto_restart:
                self.start_server()

            return Panel(f"[red]server died", title="server", border_style="red")
Portal
Steam achievements and progress for Portal - 26.67% complete with 4/15 achievements unlocked.
Whenever you are installing python packages, you should always use a virtual environment. pip makes this easy to follow by adding some configuration to pip.
require-virtualenv #
Pip is the pacakage tool for python. It installs third-party packages and is
configurable. One of the configuration settings that I highly reccommend
everyone to add is require-virtualenv. This will stop pip from installing
any packages if you have not activated a virtualenv.
why #
python packages often require many different dependencies, sometimes packages are up to date and sometimes they require different versions of dependencies. If you install everything in one environment its easy to end up with version conflict issues that are really hard to resolve, especially since your system environment cannot easily be restarted.
PIPX my one exception #
My one exception that I put in my system level packages is pipx. pipx is
very handy as it manages virtual environments for you and is intended for
command line utilities that would end up in your system env or require you to
manually manage virtual environments without it.
pip config #
Your pip config might be found in either ~/.pip/pip.conf or
~/.config/pip/pip.conf. You can either use the pip config set command or
edit one of these files manually.
pip config set global.require-virtualenv True
Now you sould see this in your ~/.config/pip/pip.conf
[global]
require-virtualenv = True
pip config debug #
If you want to know where pip is looking for configuration on your system, and
what files are setting a certain config you can use pip config debug to find
it.
❯ pip config debug

env_var:
env:
global:
  /etc/xdg/xdg-awesome/pip/pip.conf, exists: False
  /etc/xdg/pip/pip.conf, exists: False
  /etc/pip.conf, exists: False
site:
  /home/waylon/git/waylonwalker.com/.venv/pip.conf, exists: False
user:
  /home/waylon/.pip/pip.conf, exists: False
  /home/waylon/.config/pip/pip.conf, exists: True
    global.require-virtualenv: True
saved my bacon #
This setting recently saved me when I modified my .envrc file my virtual
environment deactivated, so when I went to pip install something it gave me an
error that it was not active. Situations like this are an easy way to pollute
your system with packages that it does not need installed.

TLDR #
Run this at your command line to avoid polluting your system environment by mistake before running any pip command.
pip config set global.require-virtualenv True
I’ve been trying to adopt pyenv for a few months, but have been completely blocked by this issue on one of the main machines I use. Whenever I start up ipython I get the following error.
ImportError: No module named '_sqlite3
I talked about why and how to use pyenv along with my first impressions in this post
pyenv/issues/678 #
According to #678 I need to
install libsqlite3-dev on ubuntu to resolve this issue.
install libsqlite3-dev #
libsqlite3-dev can be installed using apt
sudo apt install libsqlite3-dev
But wait…. #
When I make a fresh env and install ipython I still get the same error and I am still not able to use ipython with pyenv.
ImportError: No module named '_sqlite3
re-install python #
After having this issue for awhile an coming back to
#678 several times I realized that
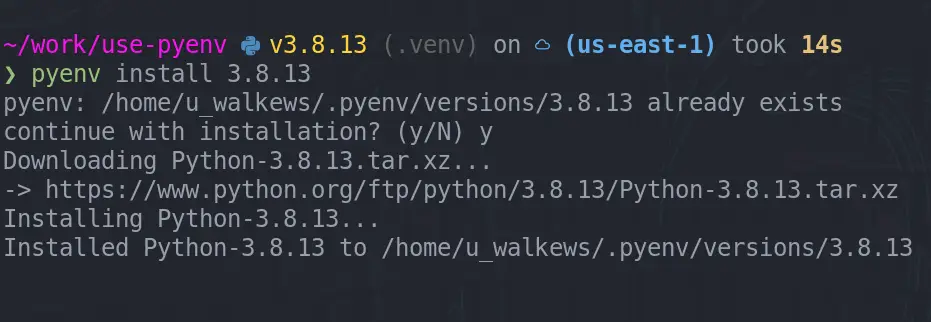
libsqlite3-dev needs to be installed while during install.
pyenv install 3.8.13
I think I had tried this several times, but was missing the -y option each
time. You gotta read errors like this, I am really good at glossing over them.
Let’s never have this issue again. #
When you spend months living with little errors like this and finally fix it,
its good to make sure that it never happens again. Whenever I start a new
ubuntu machine I run an ansible playbook that does all the setup for me. I
added libsqlite3-dev to my core install in
64c85ca
now it will be on all of my machines and not break again.
Sometimes you have a pretty old branch you are trying to merge into and you are absolutely sure what you have is what you want, and therefore you don’t want to deal with any sort of merge conflicts, you would rather just tell git to use my version and move on.
update main #
The first step is to make sure your local copy of the branch you are moving into is up to date.
git checkout main
git pull
update your feature branch #
It’s also worth updating your feature branch before doing the merge. Maybe you have teammates that have updated the repo, or you popped in a quick change from the web ui. It’s simple and worth checking.
git checkout my-feature
git pull
start the merge #
Merge the changes from main into my-feature branch.
git merge main
Now is where the merge conflict may have started. If you are completely sure
that your copy is correct you can --ours, if you are completely sure that
main is correct, you can --theirs.
git checkout --ours .
git merge --continue
This will pop open your configured git.core.editor or $EDTIOR. If you have
not configured your editor, it will default to vim. Close vim with <escape>:x, accepting the
merge message.
Now push your changes that do not clash with main and finish your pr.
git push